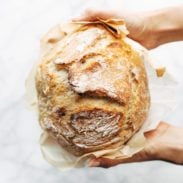
Miracle No Knead Bread! this is SO UNBELIEVABLY GOOD and ridiculously easy to make. crusty outside, soft and chewy inside – perfect for dunking in soups!
Miracle No Knead Bread

No Knead Bread = Easiest Bread You’ll Ever Make.

There’s a reason we are calling this MIRACLE NO KNEAD BREAD.
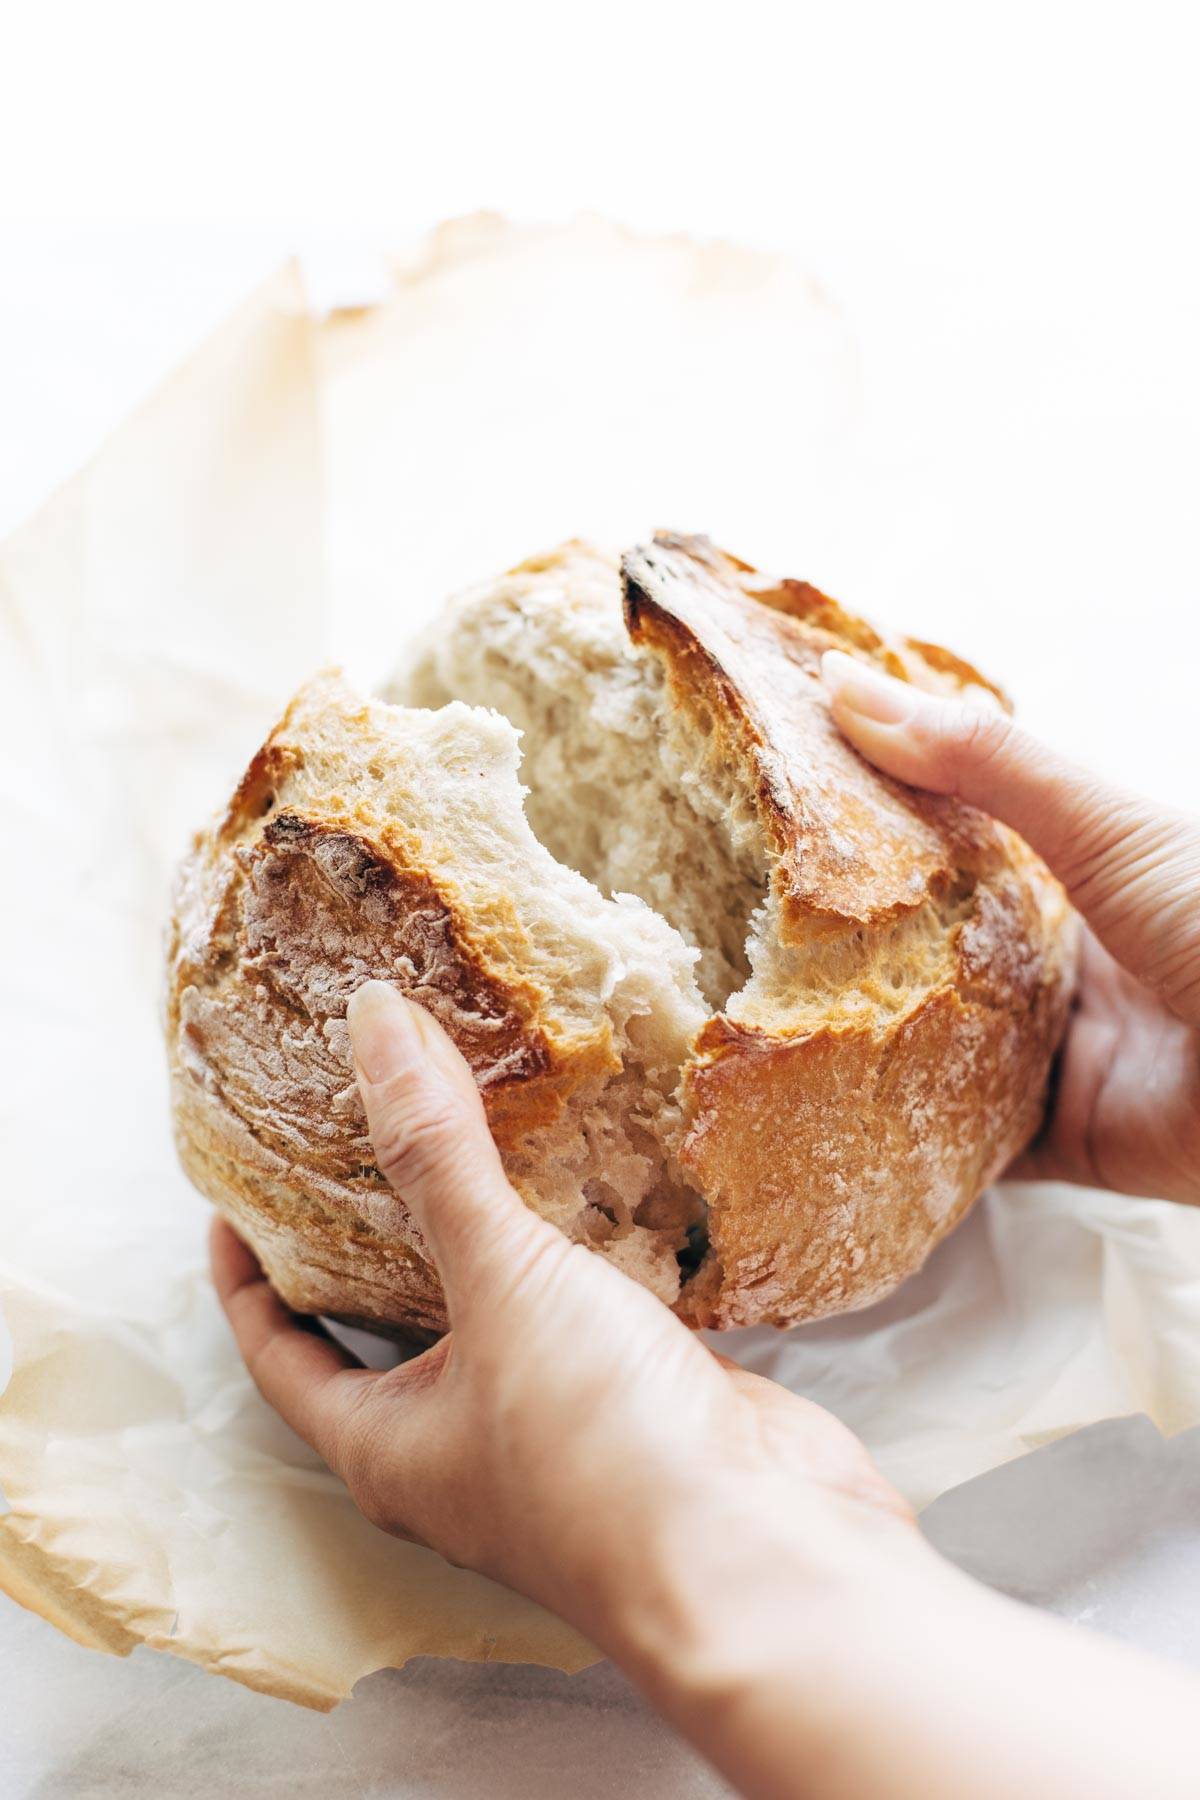
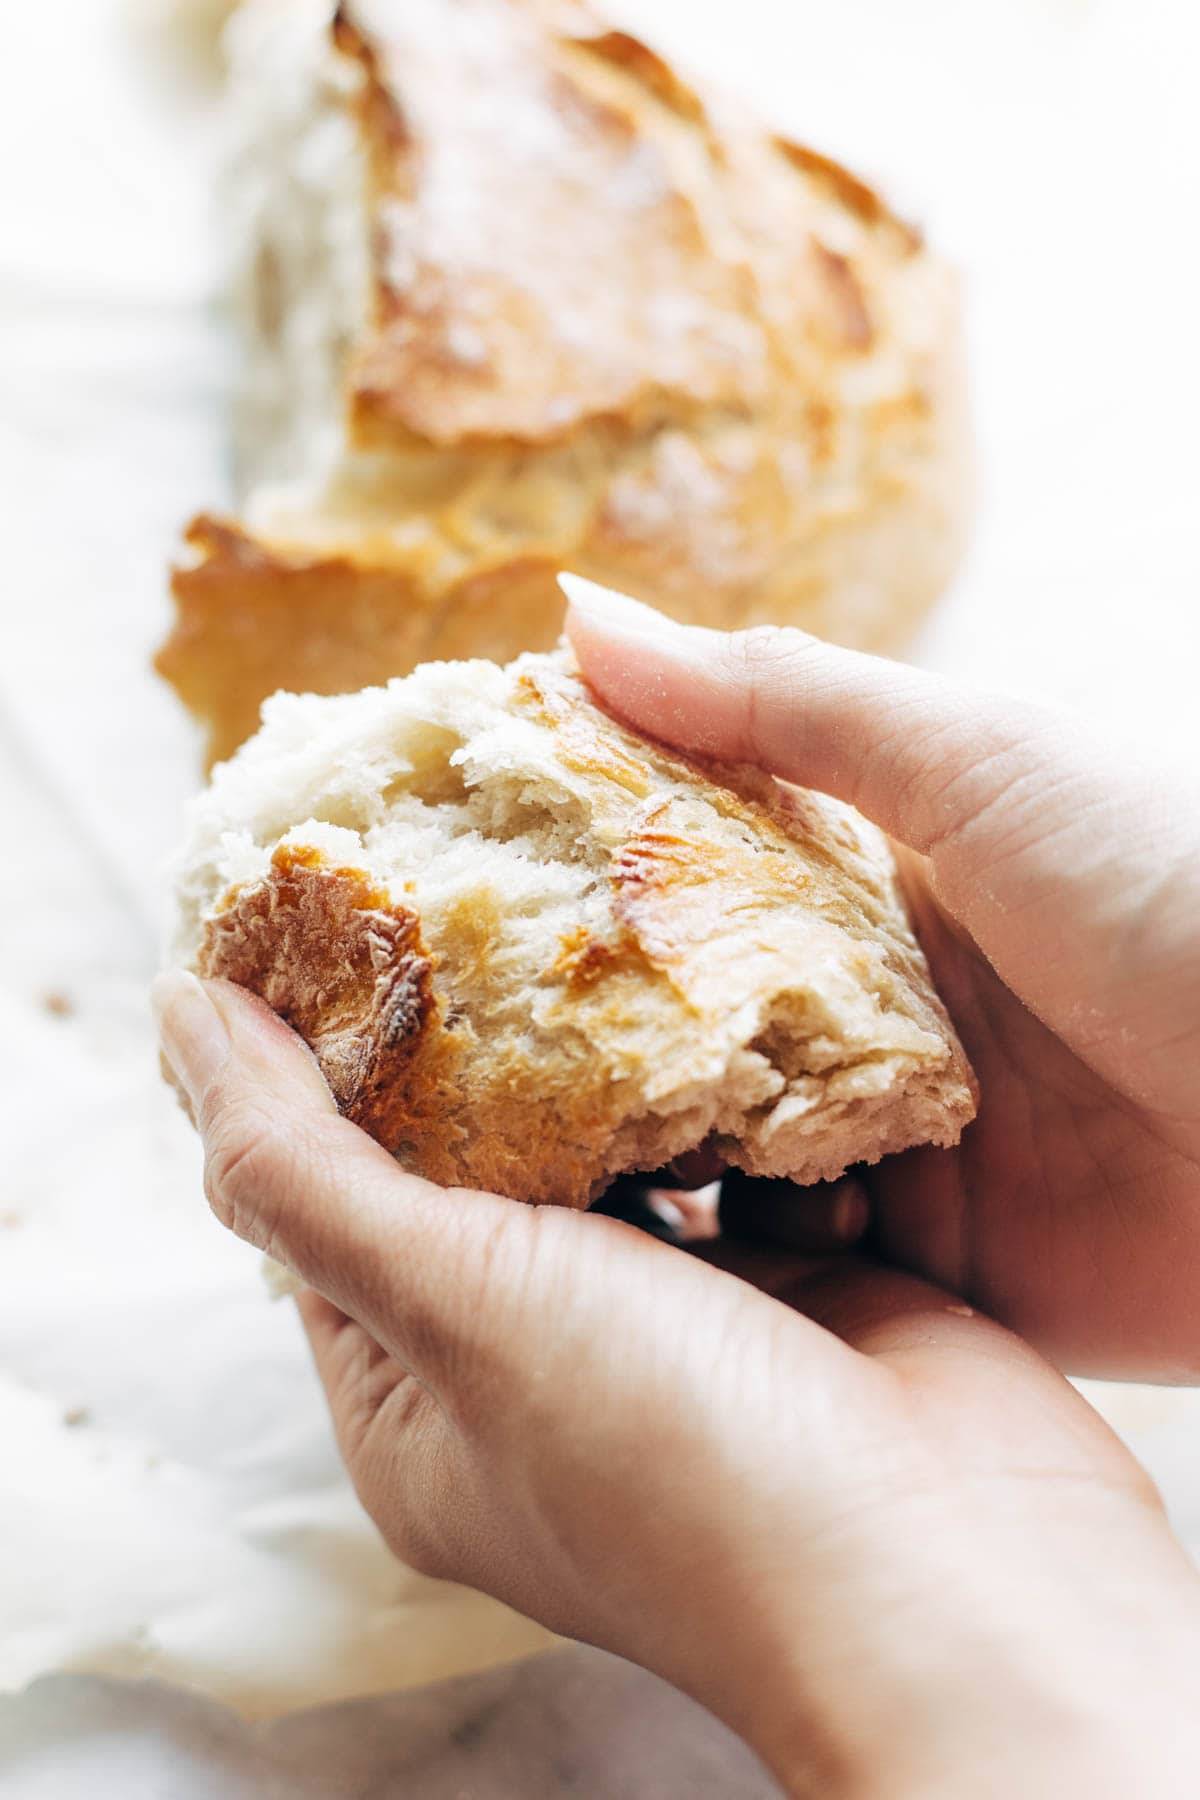
Let me paint a picture for you. It starts with a golden and ragged-looking crusty loaf of piping hot white bread being roughly torn into chunks, steam escaping, crumbs flying everywhere across the table, and it ends with that swift swooping motion as its hot n’ chewy little self dives deep into the bowl of thick soup and delivers a bit of chewy carbs sopped with flavor to your hungry, happy mouth.
Honestly. The pure bliss of this moment.
Welcome to fall, bread lovers.
YOU ARE ABOUT TO MAKE BREAD LIKE A BOSS.

Origins Of No Knead Bread
Please scan your brain right now for these lurking thoughts: “I don’t make bread.” “Bread baking takes too long.” “Yeast-y recipes scare me.”
Friends, let the record show that I am in your club. I am on that team. I have less than zero percent patience for bread recipes and therefore I do not make bread, at all, ever, and I only have two teeny exceptions, which explains the origins of how I started making actually good bread at home:
- I make brioche from Artisan Bread in 5, like, three times per year, because it makes for perfect tea rings and homemade French toast bakes and cinnamon rolls and for the times that the baking diva within comes alive. Also it’s VERY EASY.
- I make this Miracle No Knead Bread, inspired from my friends, fellow bloggers, Jim Lahey, and people of the internet, and I make it a minimum of 250 times every fall and winter because it is the opposite of fancy. Which is confusing because it FEELS fancy to pull a loaf of homemade bread out of the oven in a red Lodge Dutch Oven (affiliate link).
What Is No Knead Bread?
Well, it’s exactly as it sounds!
While many bread recipes involve a lot of kneading and proofing and rising and proofing again and Great British Bake-Off levels of stress, this one requires no kneading. The most effort you’ll put in is the quick mix you’ll do to get the flour, water, yeast, and salt combined, and the strength it takes to transfer your dutch oven into the oven (but seriously, why so heavy?).
After a hands-off overnight rest on the countertop, and quick bake, the result: perfectly crusty outsides, soft and warm insides. It is, to put it simply, heaven.
Ingredients You Need
Okay, are you ready for how short of a list this is?
- all-purpose flour (bread flour can work, too!)
- salt
- instant yeast
- water (but we’re guessing you have that on hand)
That’s it! That’s literally it!
How To Make No Knead Bread
1
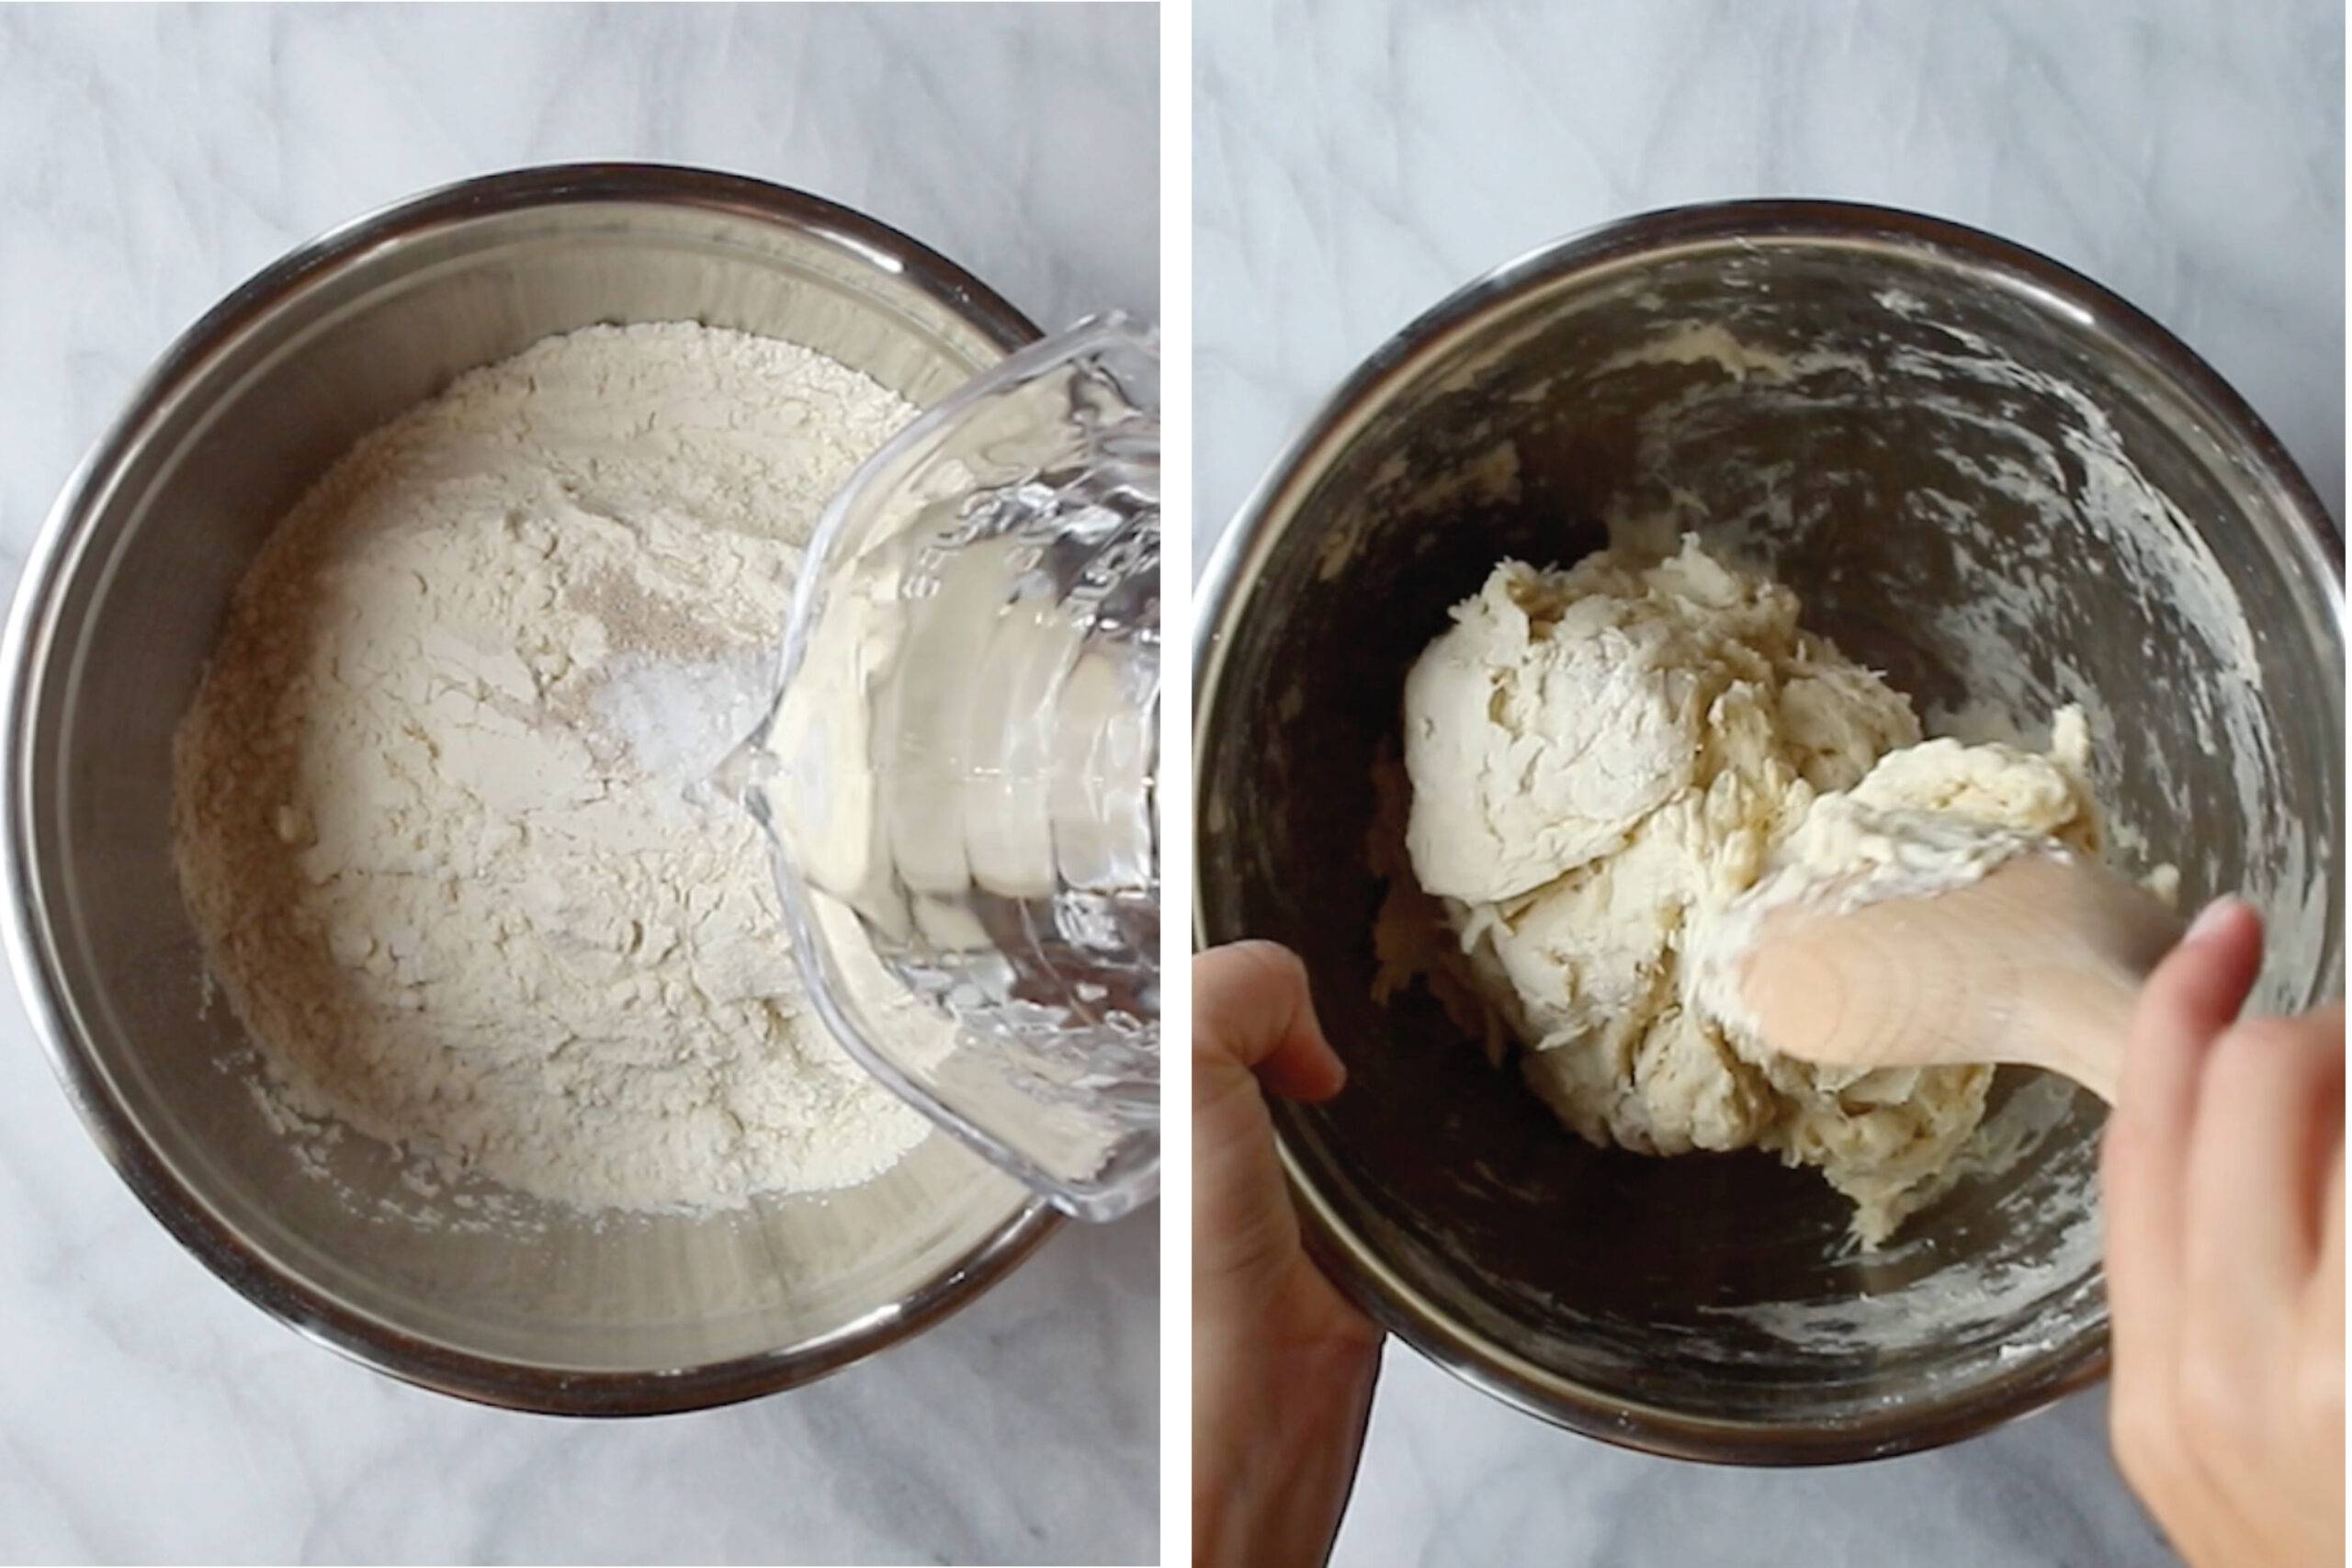
Mix the Dough.
Whisk together the flour, salt, and yeast in a large bowl. Stir in a bit of room temp water until the dough starts to form.
2
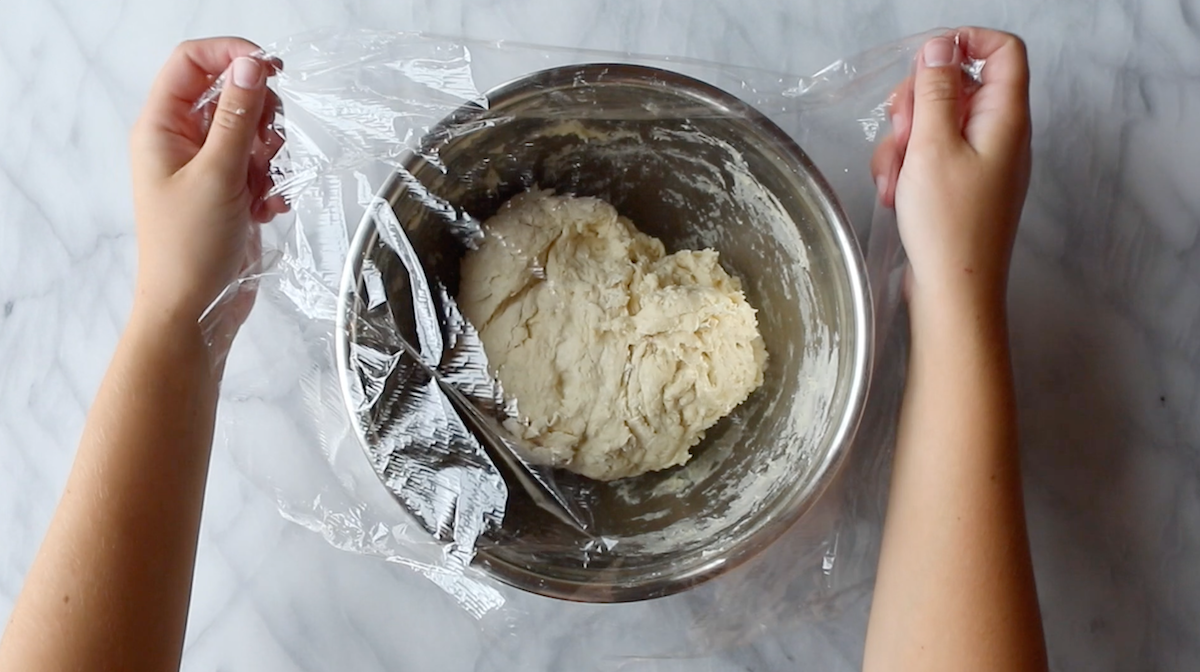
Cover and Rest For 12-18 Hours.
Cover the bowl with plastic wrap and let it just sit on the counter at room temp overnight. Just forget about it until morning.
3
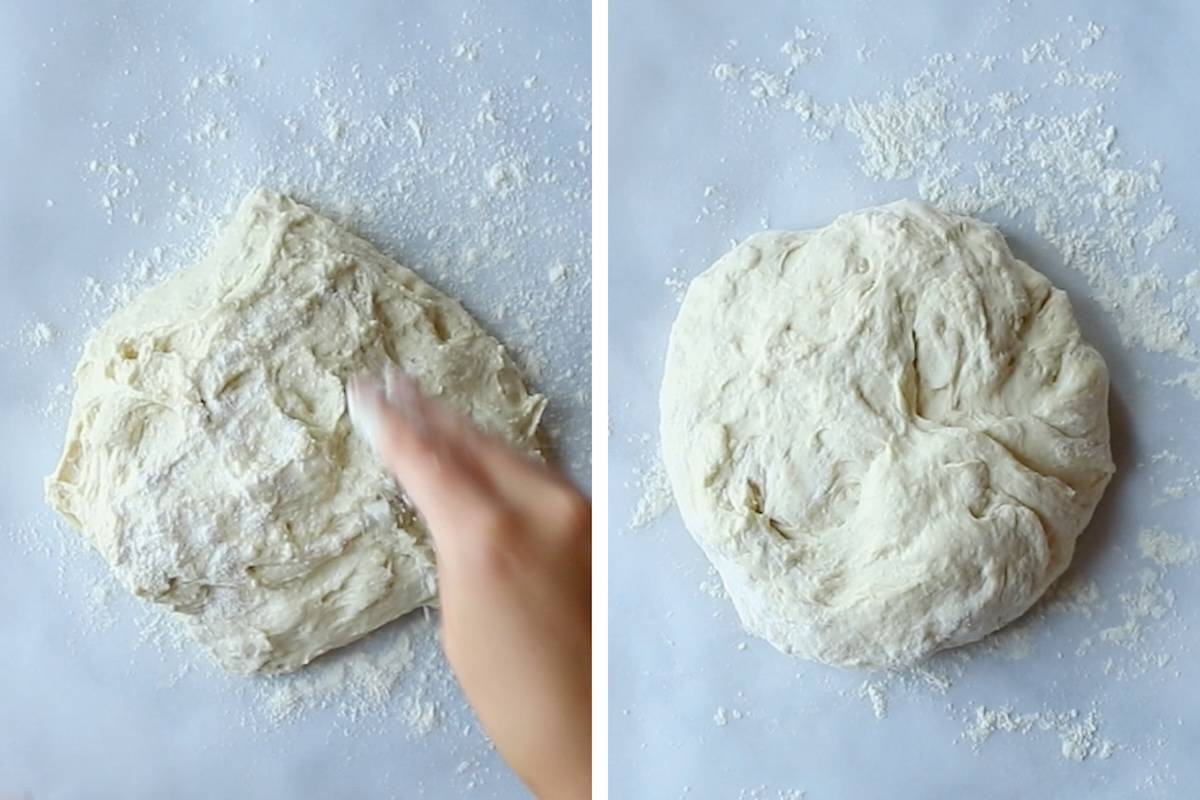
Form The Dough.
Place a sheet of parchment paper on the counter and sprinkle with flour. Remove the dough from the bowl, sprinkle it with more flour, and shape it into a ball on the parchment paper.
4
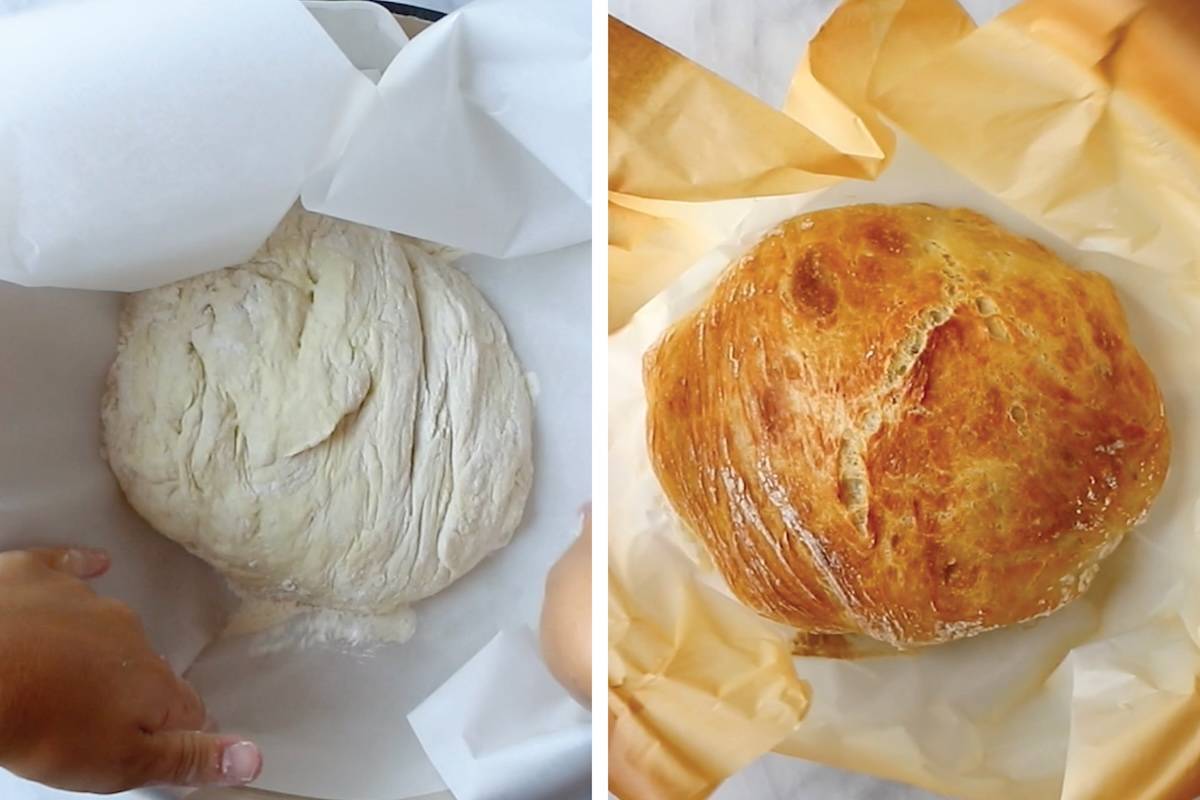
Bake Dough In a Dutch Oven.
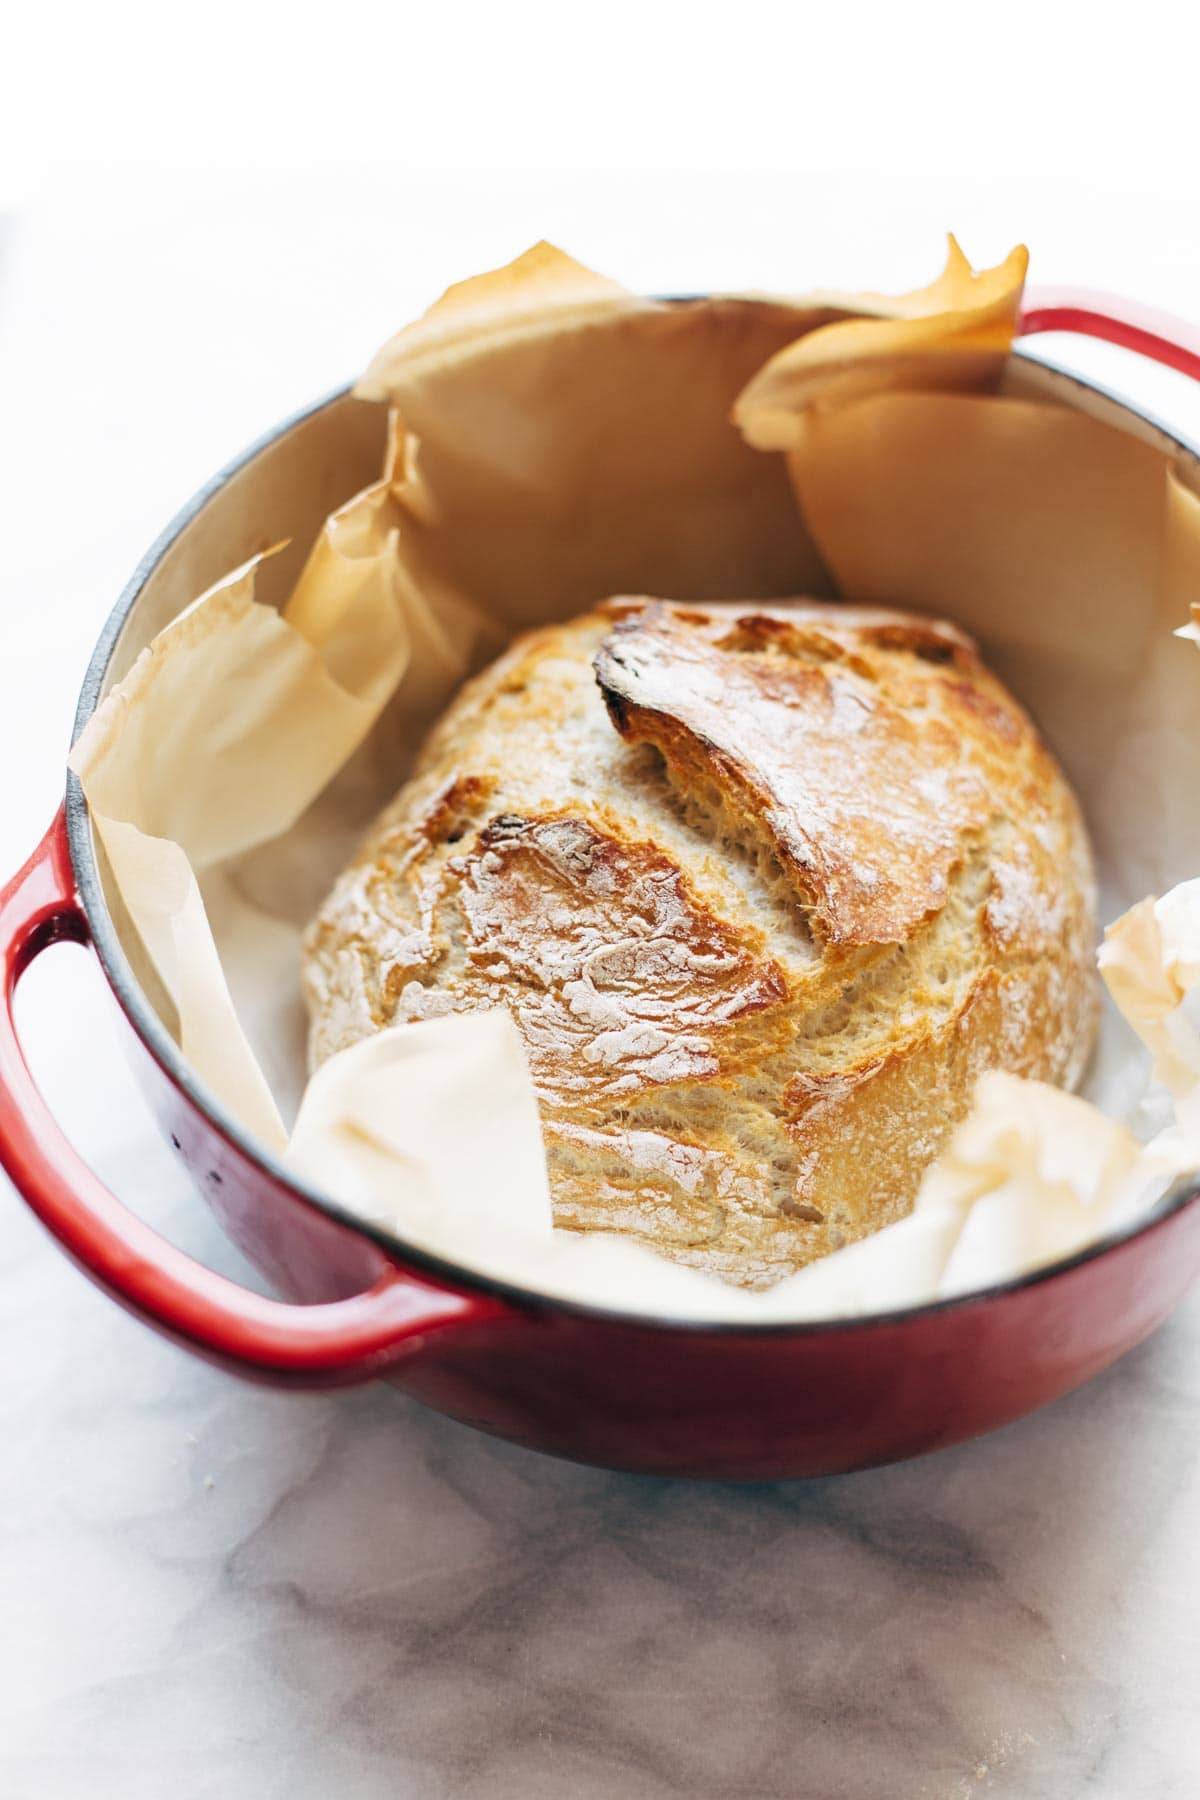
Warm up your dutch oven in the oven for a half hour or so (without the dough). Add your dough, add the lid, and bake for 30 minutes. Lift off the lid and bake for another 10ish minutes until the top gets a beautiful golden brown. That’s it! Let it cool and enjoy!

Variations and Add-Ins To Try
Obviously this is perfect in its original form, but if you’re looking to make some changes, here are some fun additions and add-ins to try:
- Make it gluten-free: I tried this flour (affiliate link) and the results were great. A hard crust formed on the outside and the inside was soft, airy, and a teeny bit spongy – close to the real thing. Some downsides: the bread didn’t rise as much as the regular version and, of course, it didn’t have quite the same flavor.
- Make it whole wheat: This is very similar to the original version. The texture of the dough was the same, it rose the same, and it looked the same coming out of the oven with its hard crust. The inside texture was denser with not as many air pockets. The flavor was a little bitter and texture was a bit gritty, but to be expected with whole wheat flour.
- Add some flavor: Use whatever herbs that sound delicious to you! Mix them in the beginning to avoid kneading later.
- Make it Cheesy: I’ve got a recipe for that! Check out our No Knead Cheese Bread.
What To Eat With No Knead Bread
Truly there is nothing better than swooping a piece of this piping hot bread into some cozy, creamy soup. Here are our favorites:
- The Best Detox Crockpot Lentil Soup (healthy, creamy, YUM)
- Simple Homemade Tomato Soup (maybe even with our No Knead CHEESE Bread?!)
- Instant Pot Wild Rice Soup (our favorite pairing)
- Instant Pot Minestrone Soup (like a hug in a bowl)
- Basic + Awesome Broccoli Cheese Soup (cheese and bread, can’t go wrong)
You can also read about ten other things I love to do with my adorable red Lodge Dutch Oven in THIS POST from years back. Yes, I am that much of a superfan.

Video For How To Make No Knead Bread
Miracle No Knead Bread
- Total Time: 18 hours 40 minutes
- Yield: 8 servings 1x
Description
Miracle No Knead Bread! this is SO UNBELIEVABLY GOOD and ridiculously easy to make. crusty outside, soft and chewy inside – perfect for dunking in soups!
Ingredients
Units
Scale
- 3 cups all-purpose flour
- 1 1/2 teaspoons salt
- 1/2 teaspoon instant yeast
- 1 1/2 cups room temperature water
Instructions
- DOUGH PREP: In a large mixing bowl, whisk the flour, salt, and yeast together until mixed. Stir in the water until a chunky, thick dough forms. If it needs a little more water, add a few more tablespoons, just enough to get it barely wet throughout. It’s gonna look scrappy and weird and you’re going to question me on whether or not this will work, but it will. Cover the mixing bowl with plastic wrap and let it rest for 12-18 hours at room temperature. Overnight is ideal here, kids.
- PREP FOR BAKING: When you’re ready to bake, preheat the oven to 450. Stick a 6 quart enamel coated cast iron Lodge Dutch Oven (or similar) in the oven for about 30 minutes to heat. At this point, the dough should be big and puffy and pretty loose, with little bubbles in it. Gently scrape the dough out onto a well-floured surface. (Remember: NO KNEAD.) Gently shape it into a ball with flour on the outside, set on a piece of parchment, and cover with plastic while your pan heats up.
- BAKE: Remove the plastic from the dough. Lift the dough and parchment together into the pan so the parchment lines the bottom of the hot pan (be careful not to touch the pan since it’s very hot). Bake, covered, for 30 minutes. Remove the cover and bake another 10-15 minutes to get the exterior nice and golden brown and crispy. Voila! Done. Miracle no-knead bread, you boss you.
Equipment
 Buy Now →
  Buy Now →
 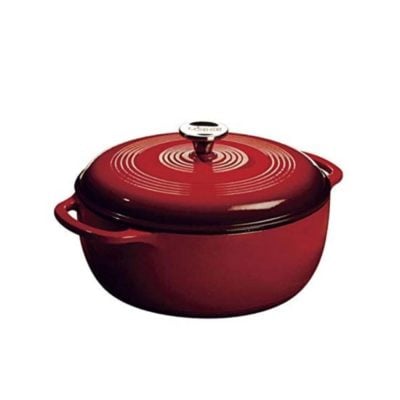 Buy Now →
 The equipment section may contain affiliate links to products we know and love.
- Prep Time: 12 hours
- Cook Time: 40 minutes
- Category: Side Dish
- Method: Bake
- Cuisine: American
Keywords: no knead bread, homemade bread, easy bread
No Knead Bread: Frequently Asked Questions
What if I don’t have a Dutch Oven?
You will just need a heavy oven-safe pot or pan with an oven-safe tight-fitting lid. Please check instructions on whatever you use to ensure it can be heated to 450 degrees.
If you want to buy a Dutch Oven, this is my favorite one! (affiliate link)
Do I need to proof the yeast first for this recipe?
Nope! Instant Yeast requires no prior proofing – you’ll just mix it right in with the flour and water.
Will active dry yeast work for this bread?
Yep! Just make sure to activate the yeast first according to package instructions.
Why didn’t my bread rise?
We’d recommend using fresh yeast for this recipe, as expired yeast can lead to bread that won’t rise.
Another culprit can be if the temperature during the rest/rise is too cold – if it’s too cold, it will require a longer rest (closer to 18 hours).
What temperature should it be as the dough rests?
Related to the above, the bread will rest/rise best at a room temperature of 70-75 degrees. In the winter, I try to place the bowl near the thermostat or near a vent so I know it’s at the correct room temperature.
How do I avoid it being too sticky when forming into a ball?
Be sure to use ample flour on the surface when forming into a ball, and sprinkle it on top of the dough too! If you’re really having trouble, I’ve also rubbed some olive oil on my hands to avoid it sticking.
Why was my bread so dense?
The best way to avoid dense bread and get those beautiful air bubbles inside is to be very, very careful when handling the dough after letting it rest. Use flour liberally if needed so that it can easily and carefully be formed into a round shape. If you handle the dough too much, the air bubbles pop and it will result in denser bread.
Can you use parchment paper at such high heat?
Technically… you’re not supposed to. Parchment paper is supposed to only go up to 425 degrees. However, I’ve never had an issue using it at 450 degrees with this recipe and just keep a close eye on it. A good time to check it is when you remove the lid. If the edges of the parchment are getting too brown, you can quickly rip or cut off those edges before returning to the oven.
Can I use different types of flours for this recipe? (Gluten-free, whole wheat, etc.)
We tried this recipe with both gluten-free flour and whole wheat flour! A few notes for each, and a photo reference below:
Gluten-Free: We tried this flour (affiliate link) and the results were great. A hard crust formed on the outside and the inside was soft, airy, and a teeny bit spongy – close to the real thing. Some downsides: the bread didn’t rise as much as the regular version and, of course, it didn’t have quite the same flavor.
Whole Wheat: This was very similar to the original version. The texture of the dough was the same, it rose the same, and it looked the same coming out of the oven with its hard crust. The inside texture was denser with not as many air pockets. The flavor was a little bitter and texture was a bit gritty, but to be expected with whole wheat flour.
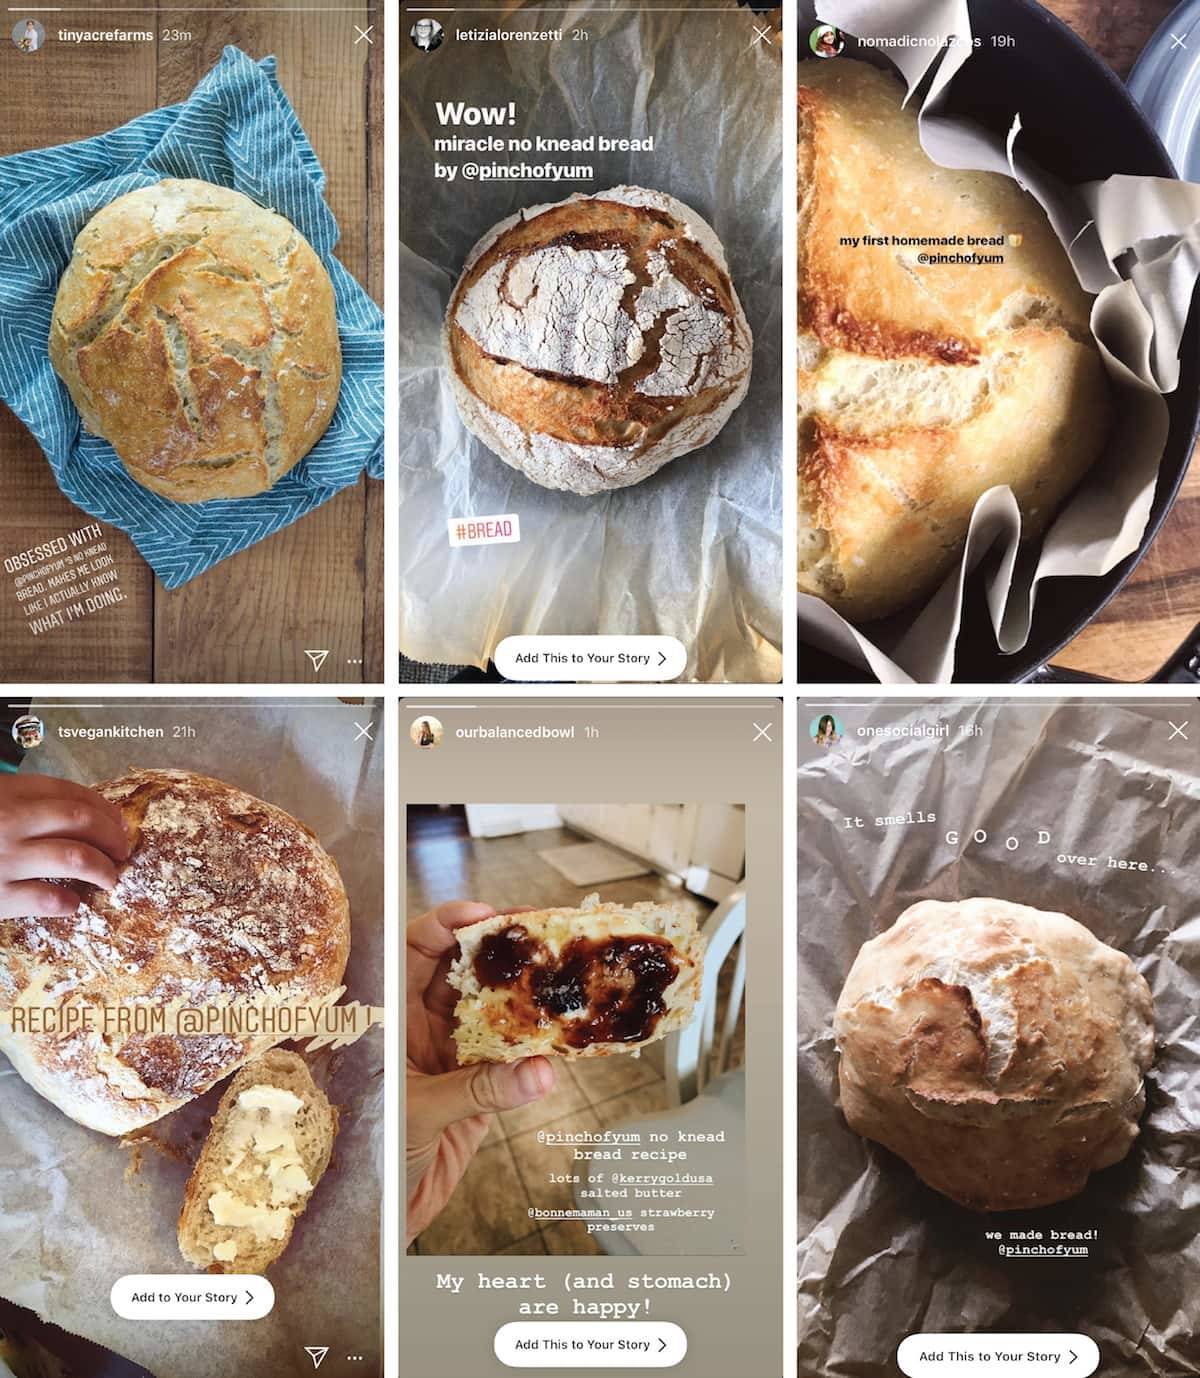
Time To Show You Off!
Tag @pinchofyum on Instagram for a chance to be featured
One More Thing!
This recipe is part of our collection of easy baking recipes. Check it out!
Filed Under: All Recipes Baking Dairy-Free Dutch Oven Fall Most Popular Quick and Easy Recipes Sides Soups Spring Winter
September 28, 2022


Nice to meet you!
I’m Lindsay and I ♡ FOOD. I used to be a teacher, and now making food and writing about it online is my full-time job. I love talking with people about food, and I'm so glad you're here.
Did you make a recipe? Tag @pinchofyum on Instagram so we can find you!

I have a last minute change in my schedule can I let it rest for longer than 18 hours before baking?
thank you!
My bread did not rise. I know it was my fault! I realized I didn’t have plastic wrap so I covered with a damp dish towel overnight. Any other suggestions on how to get it to rise??
All your recipes have been top notch so I know i was the problem! 🙂
I did the same and for me it worked.. So not sure if that’s the problem here!
Made this bread today, and tried the ‘cold start’ method by not preheating the oven or pot. I was curious!
I had to double the baking time, and didn’t need to brown it afterwards. Cooked the bread to 210 F.
There were no instructions for scoring the top, as I felt it could have risen a bit more, but there are other factors that can affect that…
Do you recommend letting the bread cool for an hour before eating so it won’t be gummy?
If you have a convection steam oven can you skip the dutch oven and just back on parchment paper?
We haven’t tested that, let us know if you do!
I have been making this a couple of times a week for years it’s so easy my kids do it often. Yummy
My bread looks beautiful but it has places where it looks like clear nail polish dried on the crust. It peels off—almost looks like a lamination. What is that and is it safe to eat?
Why is my dough sticky after overnight proofing.
Can this somehow be turned into sandwich loaves? Can you divide into into loaf pans and bake outside of the Dutch oven?
We haven’t tested that!
Hi! Just prepared my dough. Can’t wait to bake it 🙂
Thought, I don’t have a Dutch oven, do u think a normal loaf pan with something to cover it can work? Or do u suggest any other method?
Thanx ♥️
I’ve been baking for MANY years and this has got to be the Most Delicious Bread Ever..And SOOOO easy..I don’t have a Dutch Oven, But used a Cake Pan and Covered with Foil …Looks just like your Picture and It IS Crispy on Crust and very Moist and tasty on the inside…(Also, I made 1/2 the recipe)…
I have made this dozens of times, and LOVE it!! I’m curious though, has anyone tried baking smaller portions in a muffin tray with another muffin tray as the lid?
Can you use regular active dry yeast for this recipe?
somebody adding vinegar, sugar or oil,….
what is the reason?
Great instructions, until the baker handles the red hot pan with her bare hands!!!! (haha, jokes)
I love this recipe, I throw a ton of freshly chopped rosemary in this mix and top with even more and some course Maldon sea salt flakes when putting in the oven. Always a hit with beef and beer hotpot for dipping and mopping!
Made the dough around 7 am. Put it in the oven around 5 . Came out great ! Plan to make this several times a week and get into a routine to pop it in first thing in the morning. Kids are home from college and summer will be starting soon . Easy and so much healthier than most store bought ) Thank you ! Love your site ! Lots of delicious ideas 💖
I was wondering if you could do it in the daytime in time for supper. Thanks for your comment.
Will this work in a regular bread pan if it’s covered?
I have been making this bread for several years, always comes our great, wonderful best of show at county fair. Was wondering how far in advance can make the bread
I’ve never made bread before. But I wanted to impress the family for our recent Easter dinner and it was a HUGE hit! My first batch came out too wet, so I had to start over. The instructions weren’t exactly clear about how much water to ACTUALLY use, so I poured it all in. (Bread newbie, remember?) But I quickly learned and all my batches after that turned out amazing. Perfect texture for decadent grilled apple-cheese sandwiches, perfect for dipping in soups, and even for just toasting and adding some melty butter. Try this recipe! (But remember, don’t use all the water!)
Hi, I only have a 3 quart pot so I’m halving the recipe. Do I still cook it for the same length of time or should it be reduced? Many thanks.
We haven’t tried baking a half version of this so can’t say for sure! I would probably check the bread at the halfway mark to see how it’s coming along – I would assume though that it takes less time!
I’ve been making this recipe since 11/19, I’m up to 408 loaves!
I’ve added herbs, cheeses and anything else my people want.
Every gathering that requests a dish to pass everyone counts on my bread showing up!
I now have a Left Crueset bread oven it it comes out even more delicious.
Thank you this perfect recipe!
Wow! This is amazing! Well done!
The bread has a 100% success rate in my house! Easy, delicious, and loved by my family and friends!
Hi. This bread sounds amazing. If I use bread flour instead, are there any modifications to make to the recipe? Thanks so much!
Hi Lisa! Other readers have used bread flour without modifications and had great results.
I make this bread weekly and it’s magical! Literally takes less time than driving to the store to buy bread and so delicious!
I’ll be making it very soon. Thank you for such an easy bread recipe!!!
OMG! This bread is everything! I’m so glad I found this recipe. I’m not a baker but I am learning and this came out so well yesterday I’m making another loaf today. Thanks so much for sharing this!
After baking 2 loaves previously, which turned out great, yesterday’s loaf was a runny mass. So I added more flour to make it manageable. Put it back in the bowl and let it rest for several more hours. Then I carried on with baking it as the recipe said. It ended up being a bigger loaf, but it tasted just fine. I use a 4.8 qt. pot. “Leftovers” can be made into French Toast or Bread Pudding, or cubed and used as stuffing. 👍🏼